Rule Base Art
Rule based process is to create a 2D series of forms.
My Rule : Circle


1.First I draw a circle and added a triangle.Then I fold the shape to create 3D shape.

2.In the 2nd shape I added one more triangle and then I join the shapes and make a 3D shape.

3.In the 3rd shape I added a square and created a shape.


4.In the 4th shape I added one rectangle and then create 3D shape.


6.In the 6th shape I added one more circle.

7.In the 7th shape I removed the half circle.

8.In the 8th shape removed the half circle and the square.

9.In the 9th shape I added one square.

10.In the 10th shape I added a circle.

11.In the 11th shape I added one rectangle and then created amazing looks and shapes in 3D.

12. In the 12th shape I removed one circle from my shapes.

13.I added one square in the 13th shape.To create 3D shapes I followed the set of rules.Paper folding art is really useful to understand and how to create different shapes.In the fashion many designers are inspired by 3D shapes and even worked on it and the architectural shapes are too influenced by paper folding art.

Origami Fashion is also influenced by paper folding.


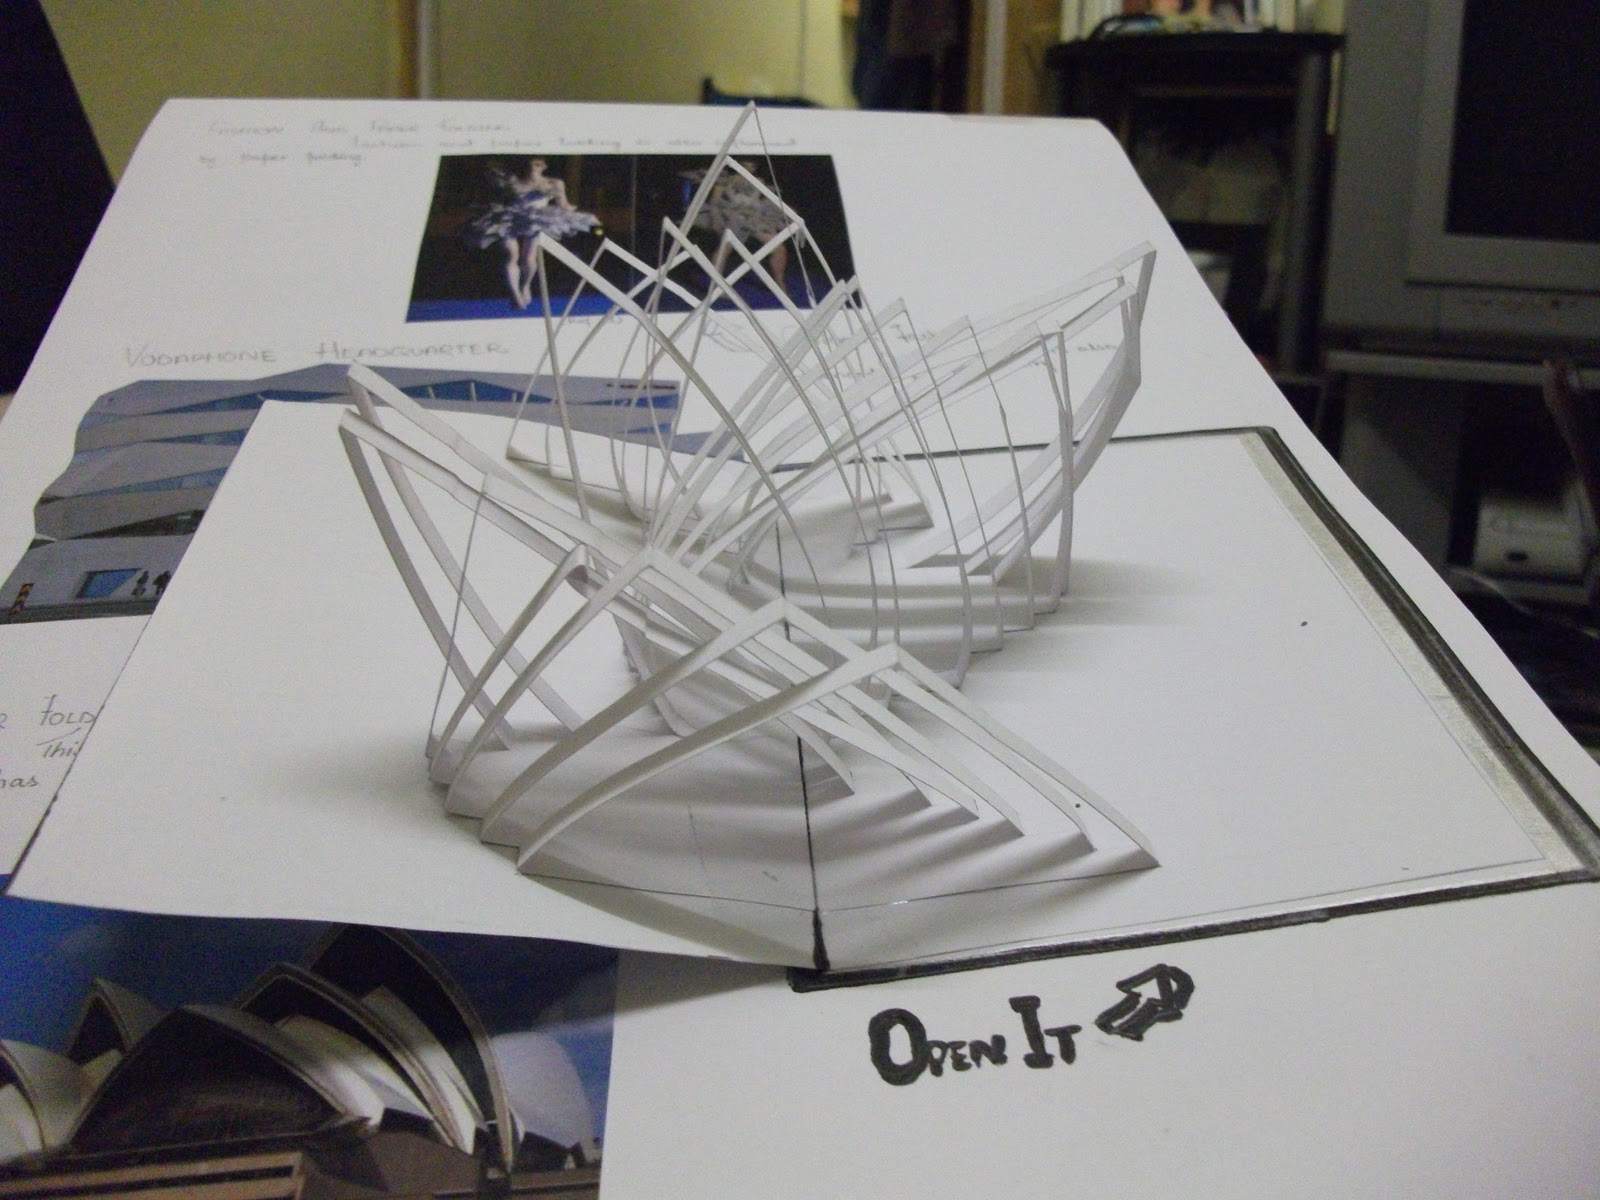
This design (Inspired with Sydney Opera House) has been produce by me using pop up techniques.


Some buildings are also influenced by the paper folding and this Vodaphone Headquarter is also gives the really look influenced by the paper art.


